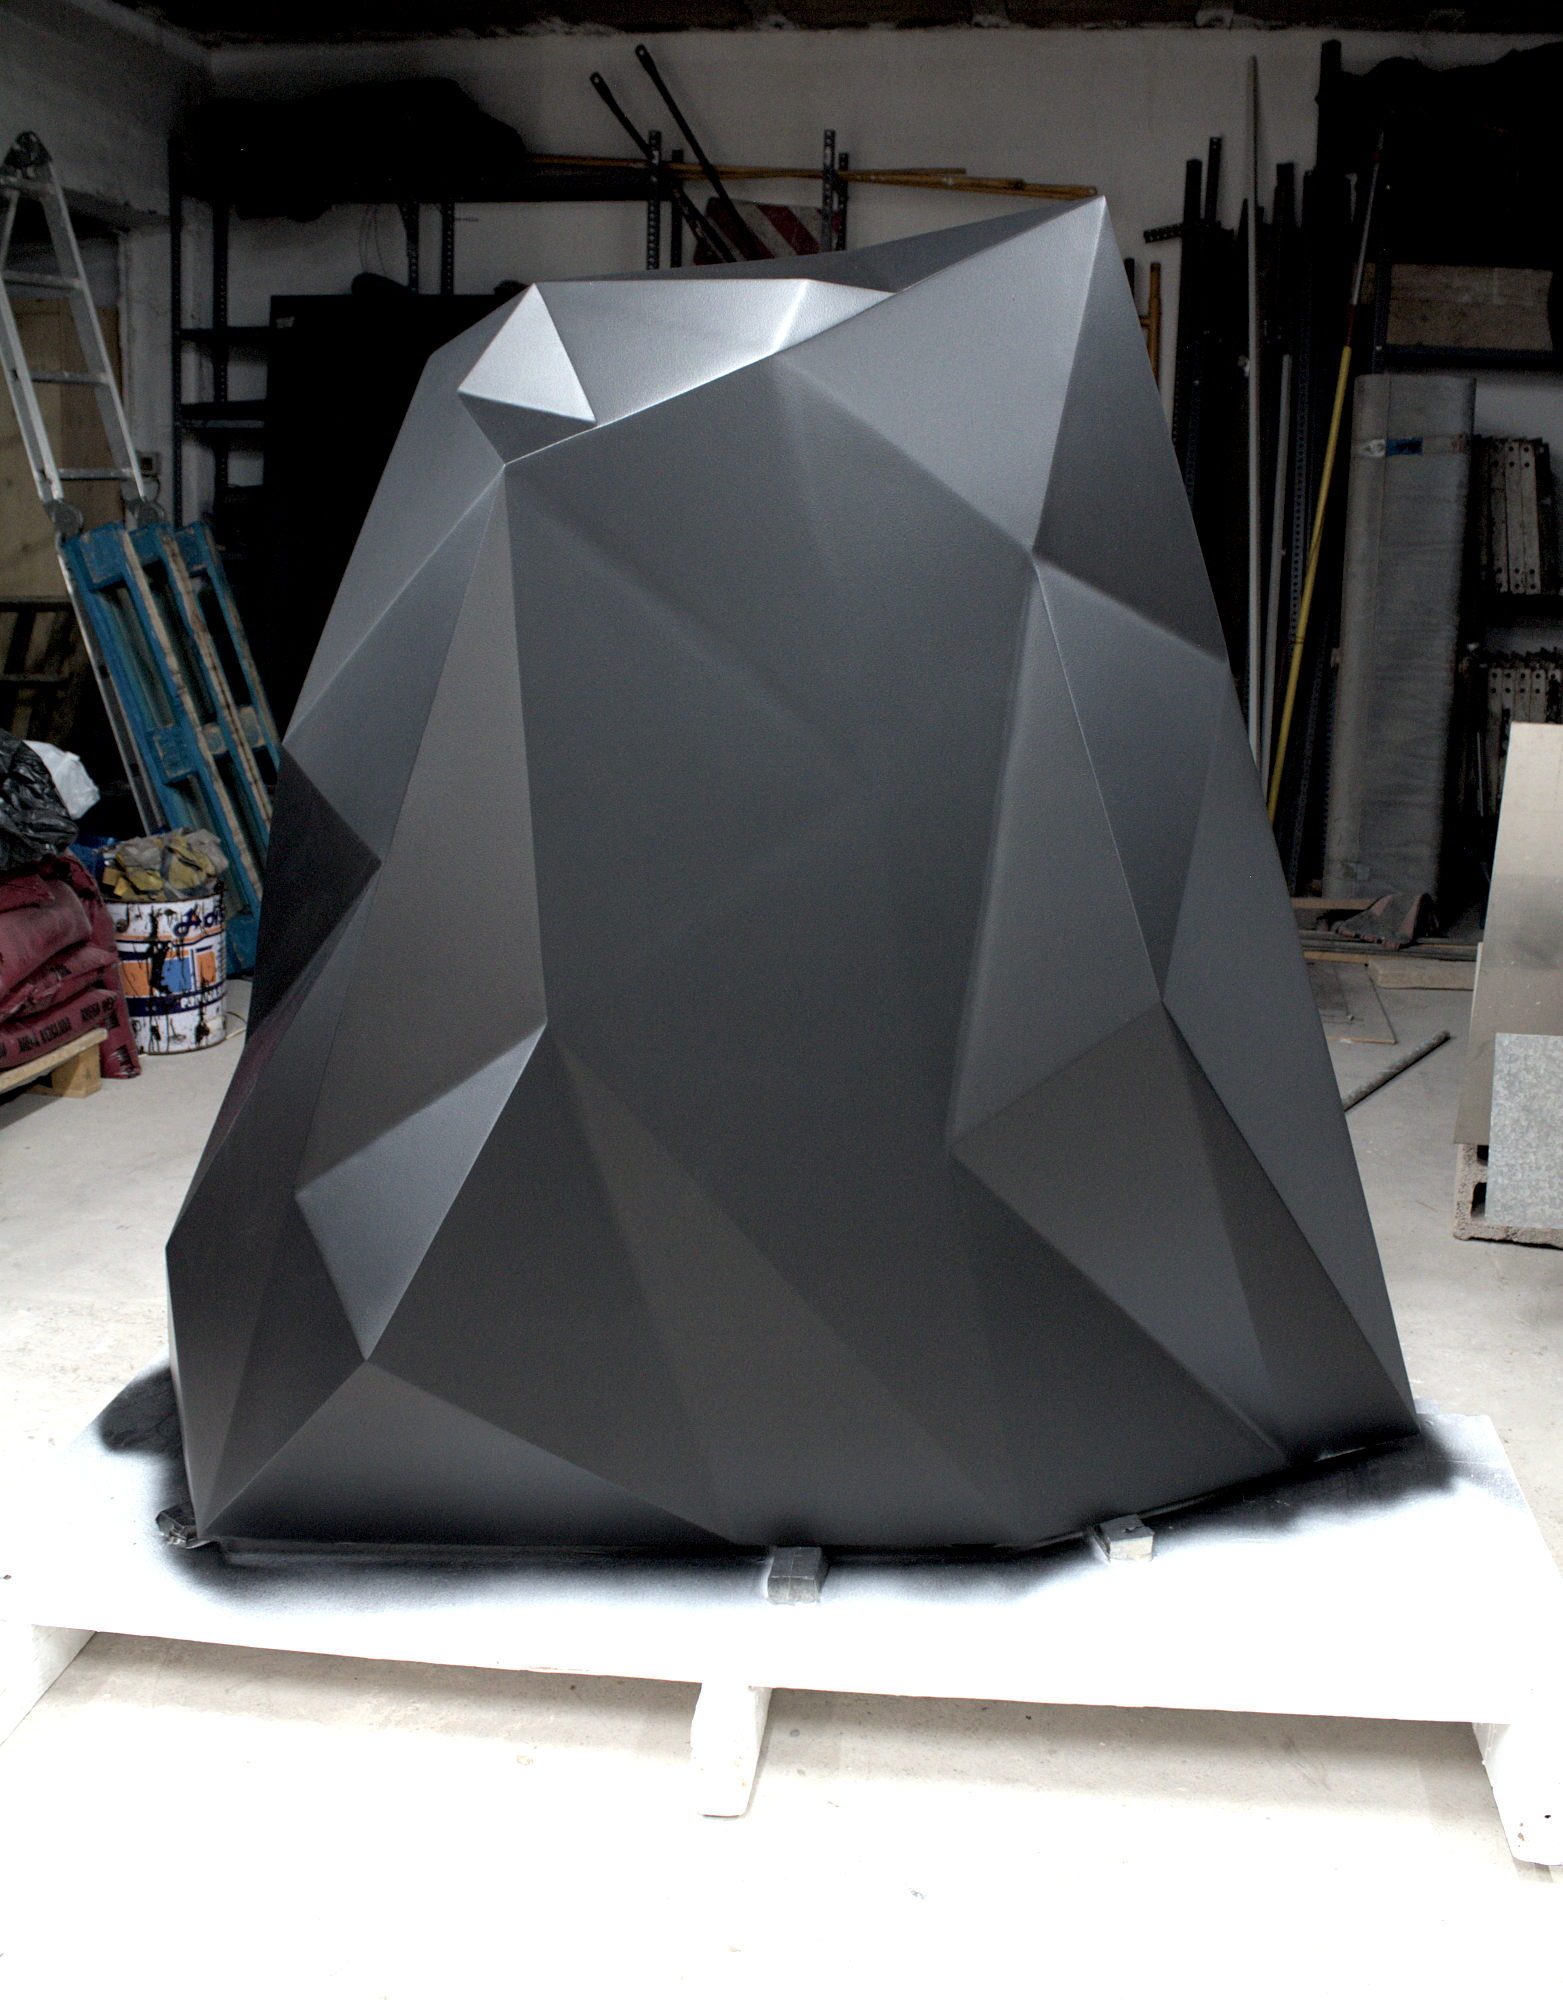
PHANTASMATA
Phantasmata consists of three metal sculptures with faceted surfaces and a textured satin-black finish. Their irregular geometry, inspired by stealth technology, makes them appear to evade the gaze—blurring their contours as they interact with light and their surroundings.
Read more…

CELLULAR AUTOMATA
The Cellular Automata series is based on the principles of the Game of Life devised by British mathematician John Horton Conway in 1970, in which a grid of cells evolves over discrete time steps. By transforming these time-based systems into a "frozen" three-dimensional organism, the powerful and magical patterns behind each cellular automaton become visible as a whole.
Read more…

CLOUD TOWER
Cloud Tower is based on a Metaball algorithm that fuses randomly generated spheres of different sizes into a single body. This corpus is divided into individual layers and held in place by fine supporting columns. The result is a seemingly magical structure of floating layers that intersect and merge, reminiscent of a utopian futuristic skyscraper.
Read more…

HUEVO
'Huevo' creates a field of tension between opposites. On the one hand, the perfectly harmonious egg shape, based on the mathematical equation of the egg; on the other, the complex, technical, interlocking structure of 36 oval steel sheets. Tranquillity, fragility, security and the origin of life are juxtaposed with a massive, unsettling construction reminiscent of a medieval cage from which there is no escape.
Read more…
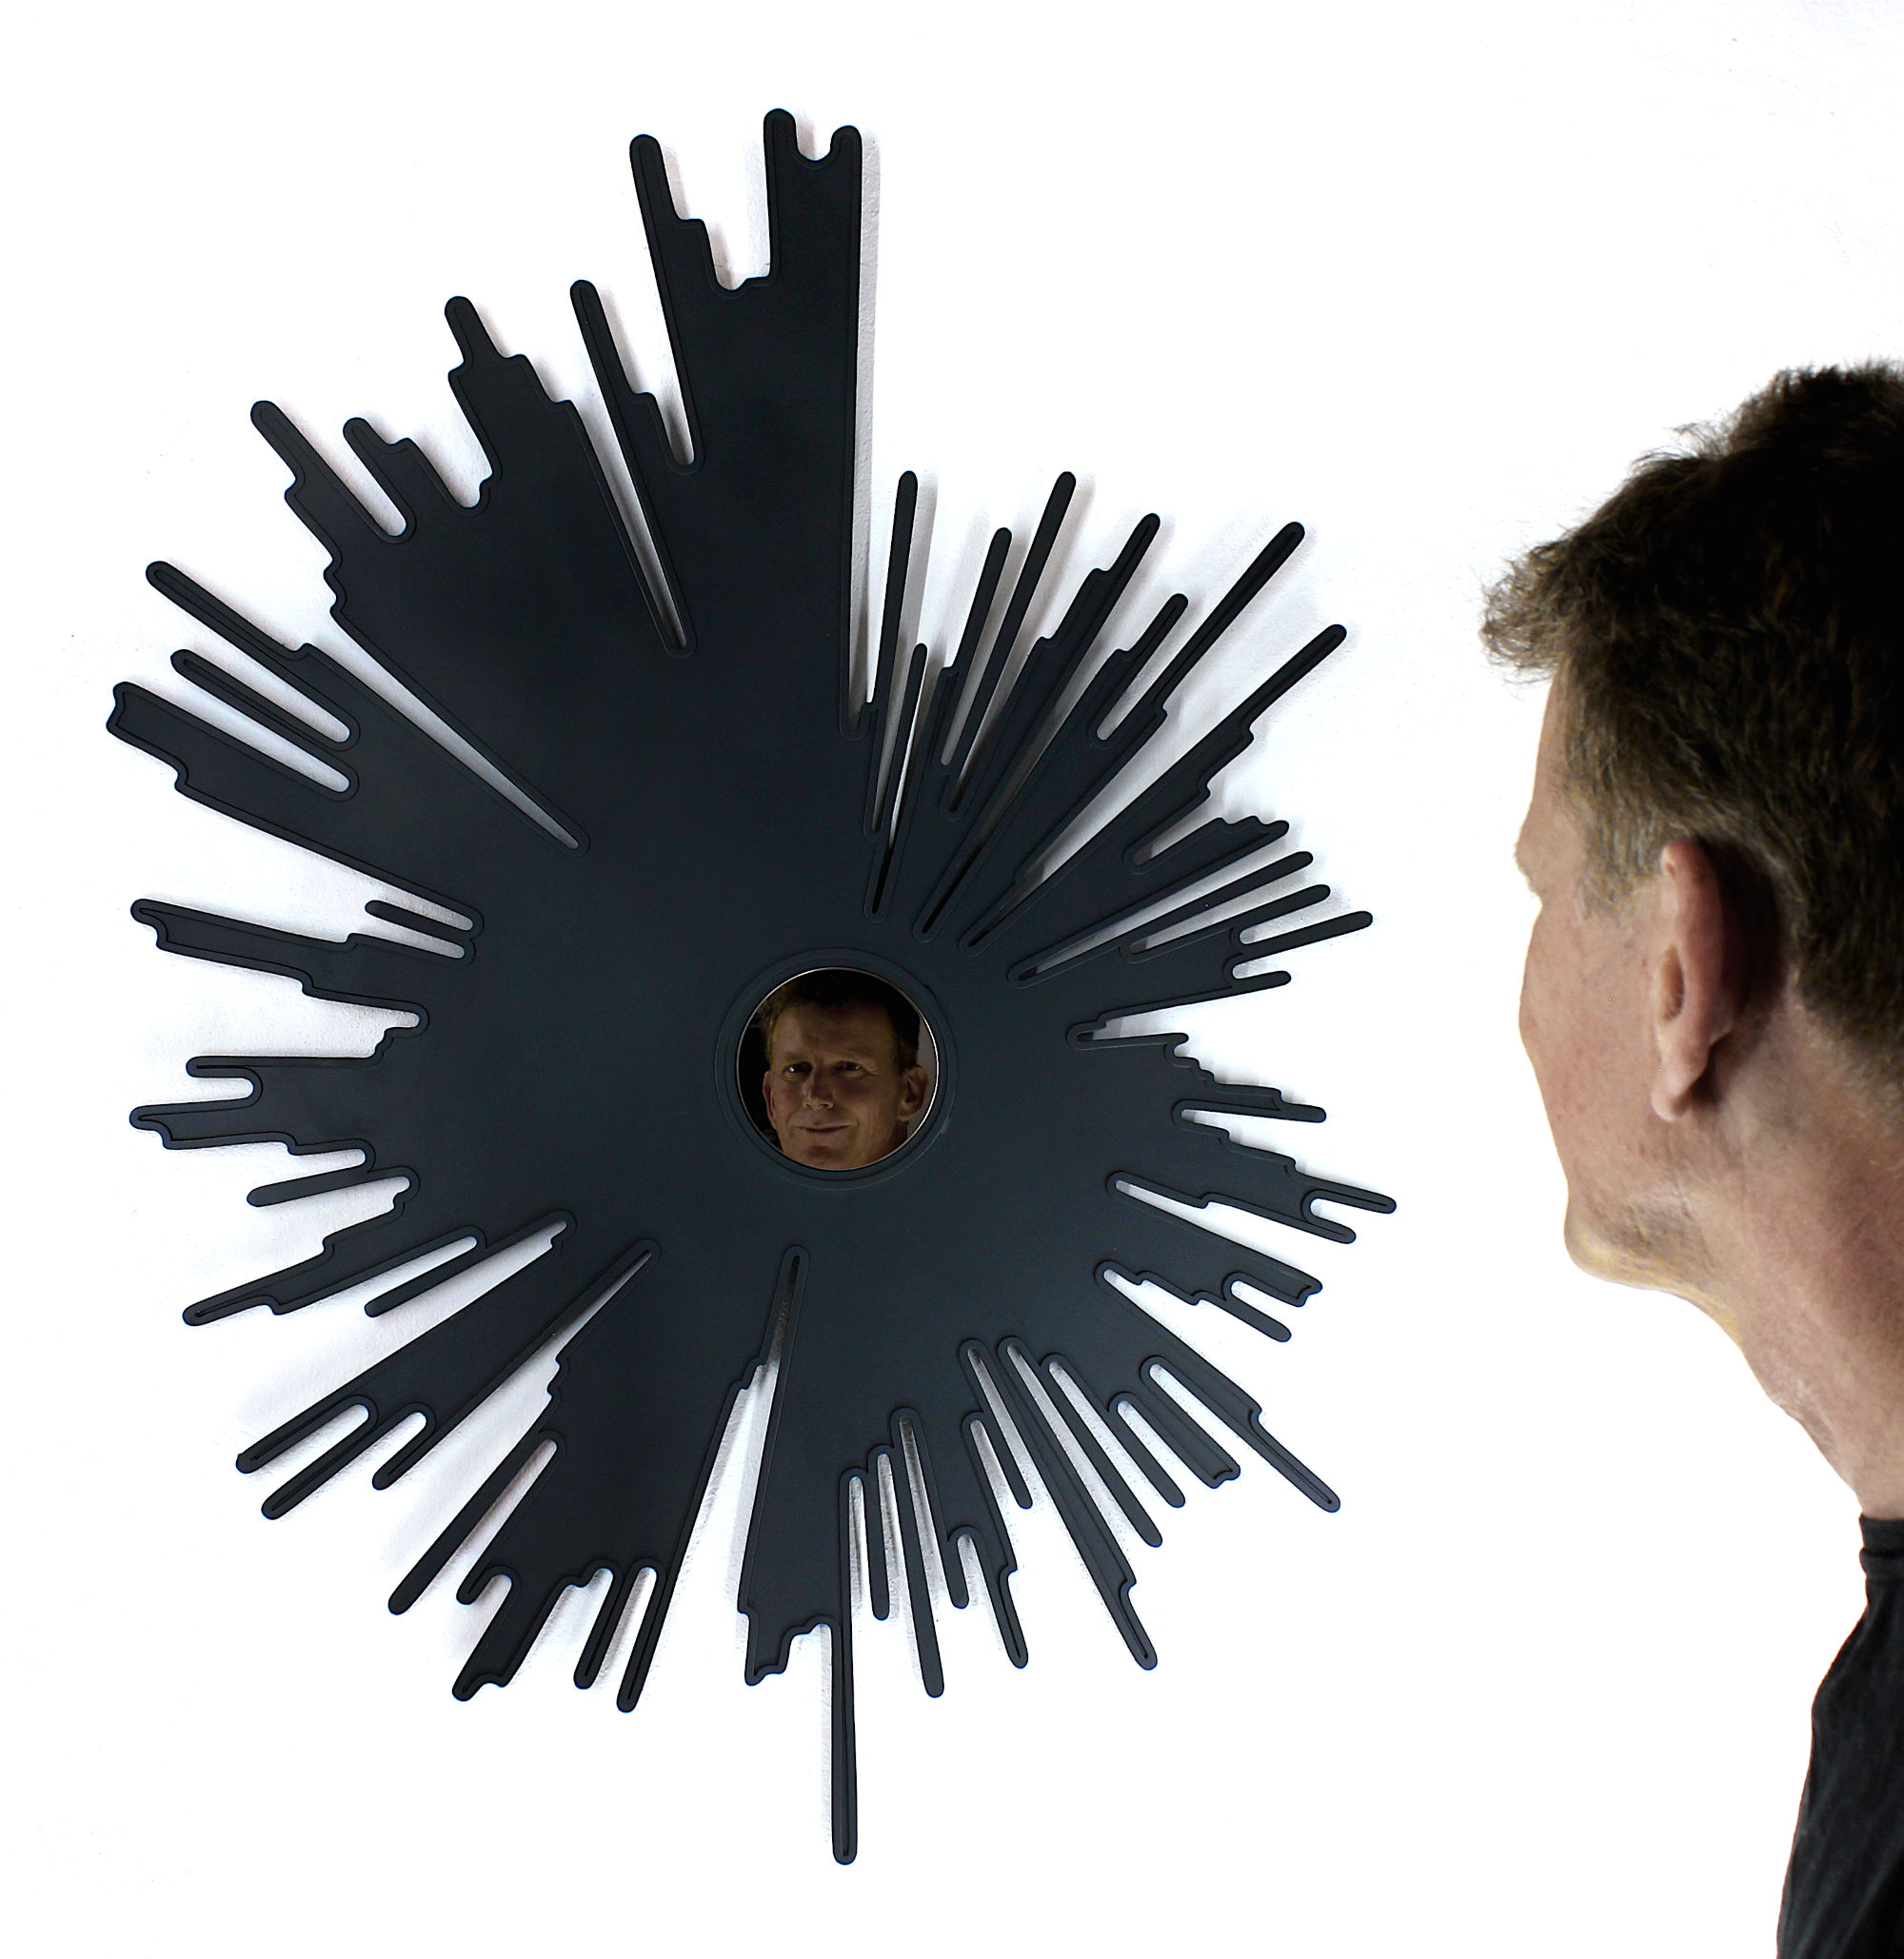
SUNBURST
In "Sunburst", the sunrays shown are derived from climate anomalies of selected countries from 1850 to the present. The mean annual temperature anomaly is generated as a sunburst graph. The sunburst mirror, a decorative object meant to bring a bit of hubris and divinity into the home, subtly becomes an ominous warning of a turning point in history. The reflected image of ourselves is no longer framed by golden rays of sunlight, but by anthracite climate data.
Read more…
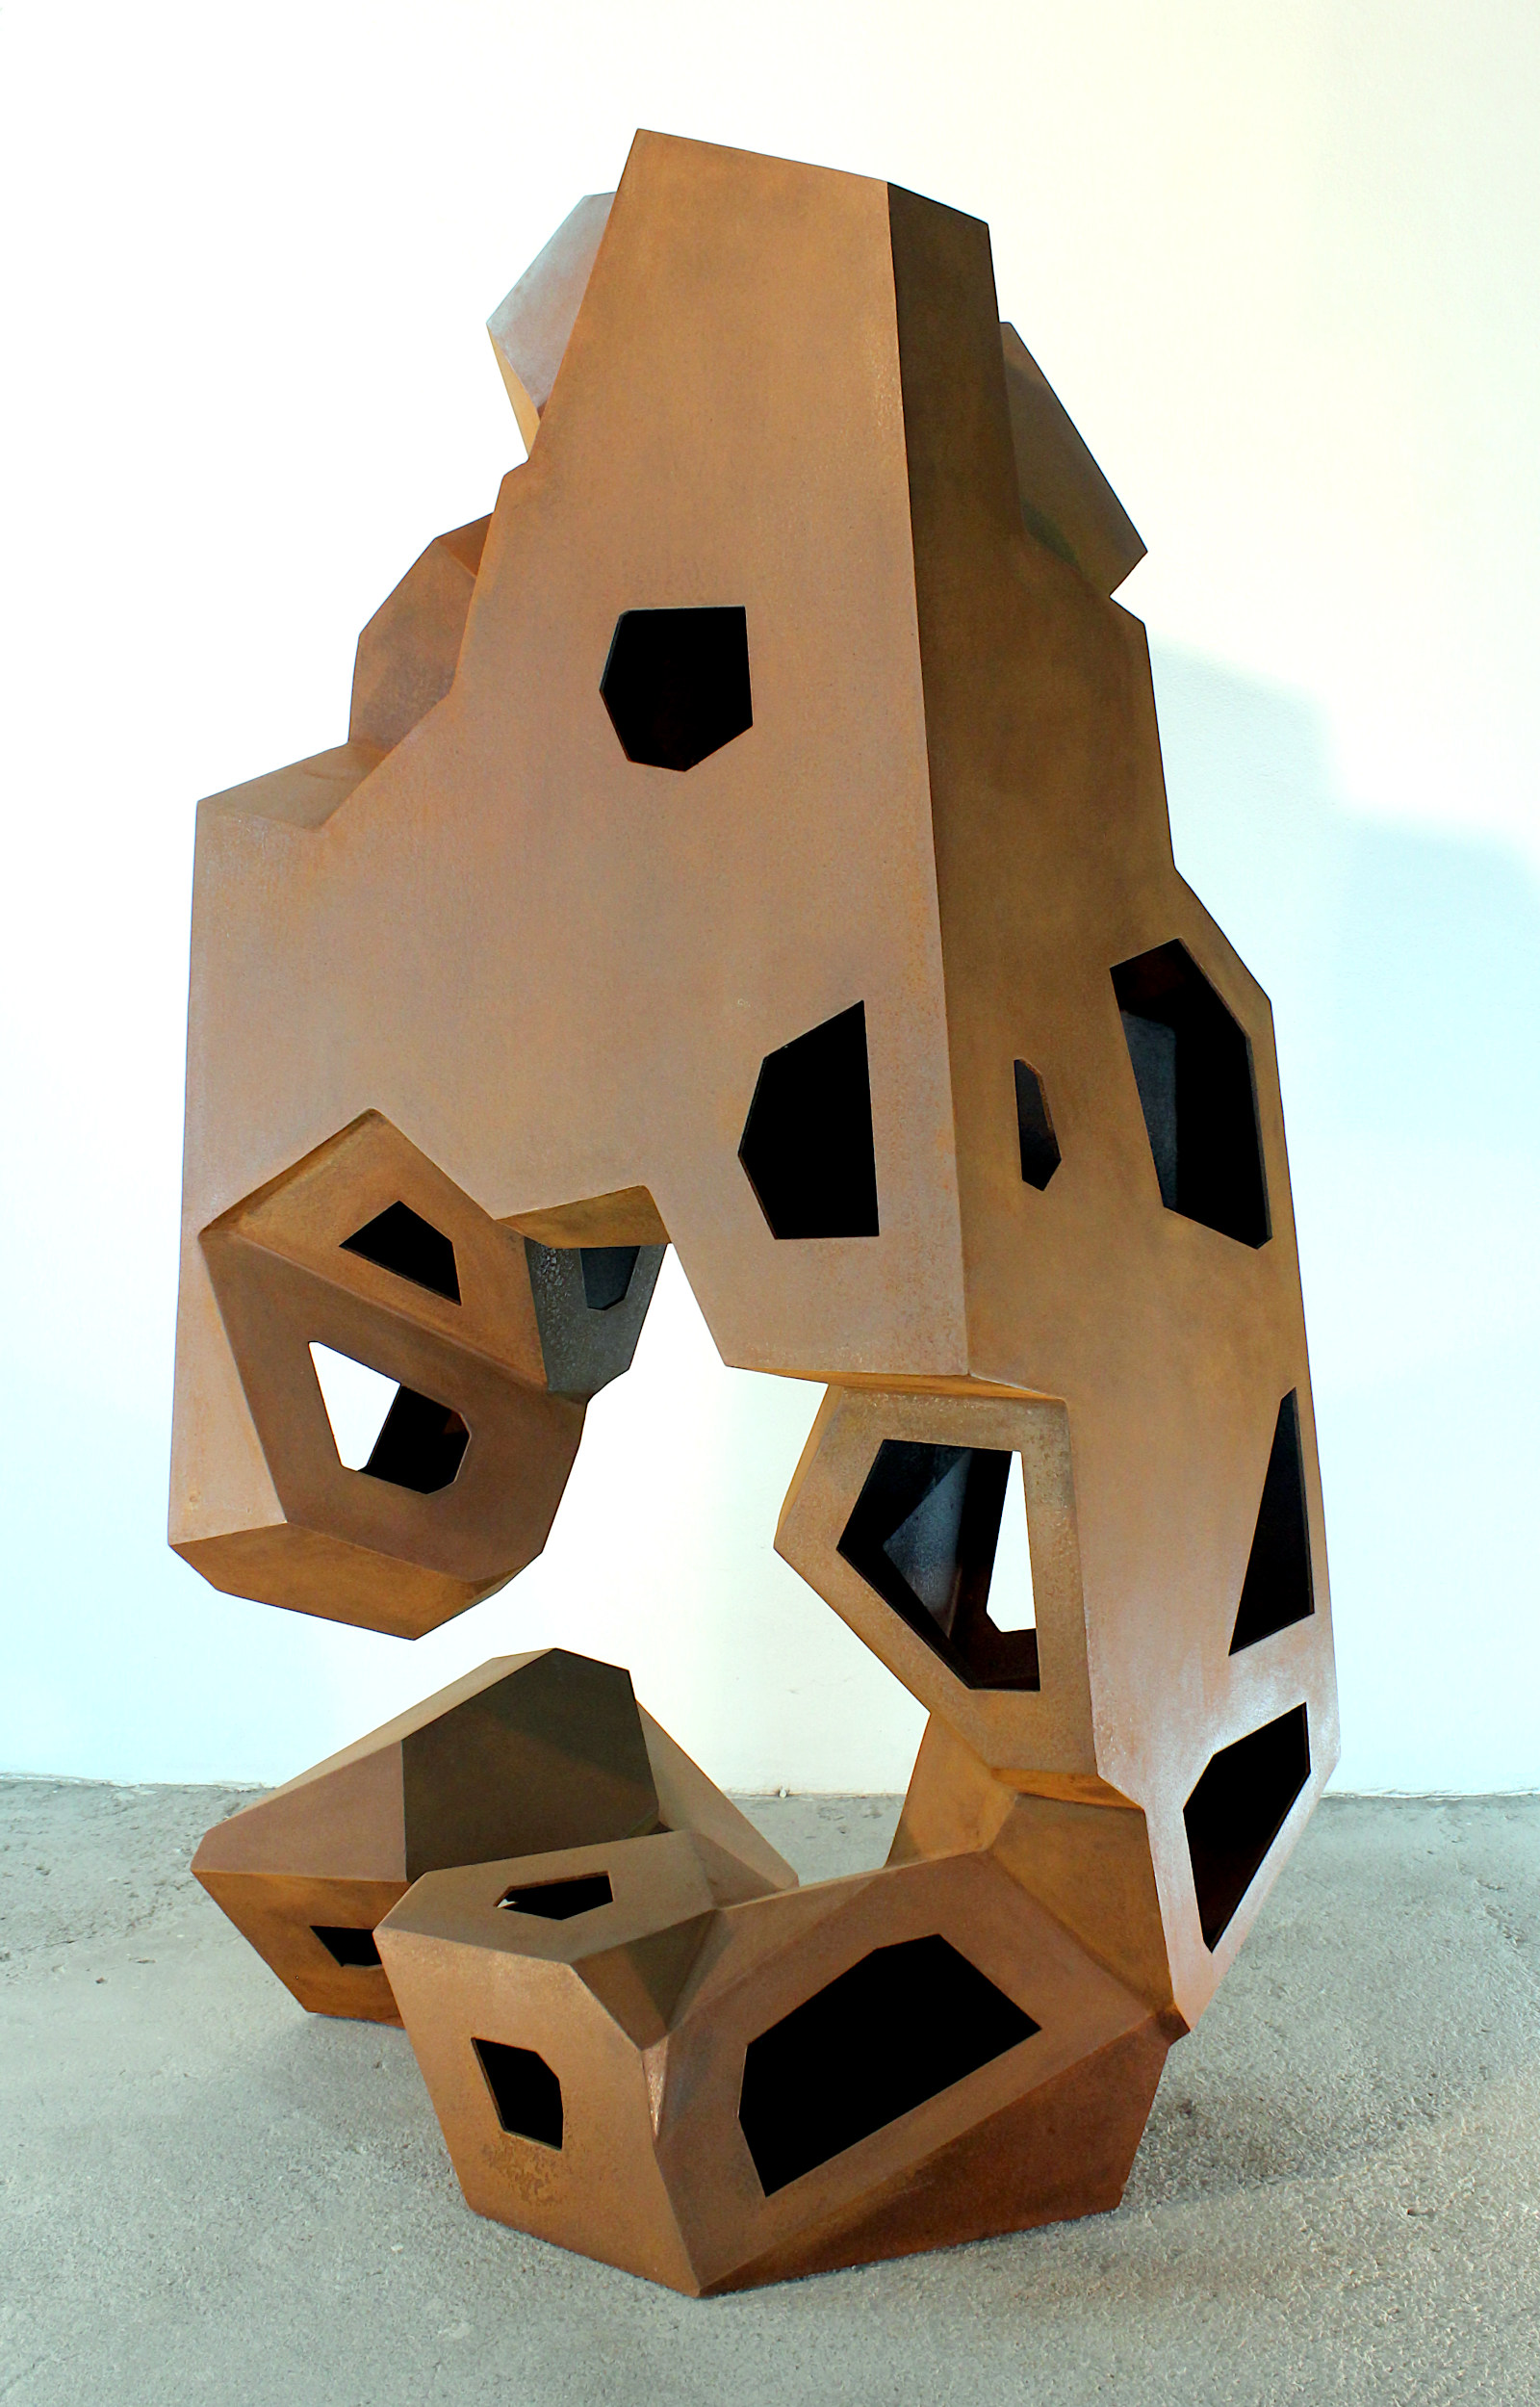
The Bunker Series
An ongoing series of parametric sculptures made of 3mm and 4mm corten steel. By strictly following the computer generated cell structure, the bunkers often look surprisingly strange and brutalist, out of proportion and form, like an improvised and randomly grown construction.
Read more…

White Noise
White noise is a term used in acoustics to describe noise that is uniform across all frequency ranges. In the visual field, we are familiar with the white noise image that forms the basis of the work presented here. The image noise is analyzed and divided into different bright and dark areas, with the dark areas marked by small square cutouts. The resulting pattern is a random arrangement of lines, rectangles and squares cut out of the metal plate.
Read more…

STONE
Dividing an organic shape into discrete lines and rebuilding it with welded 6mm steel sheets to create a pixelated object.
Read more…
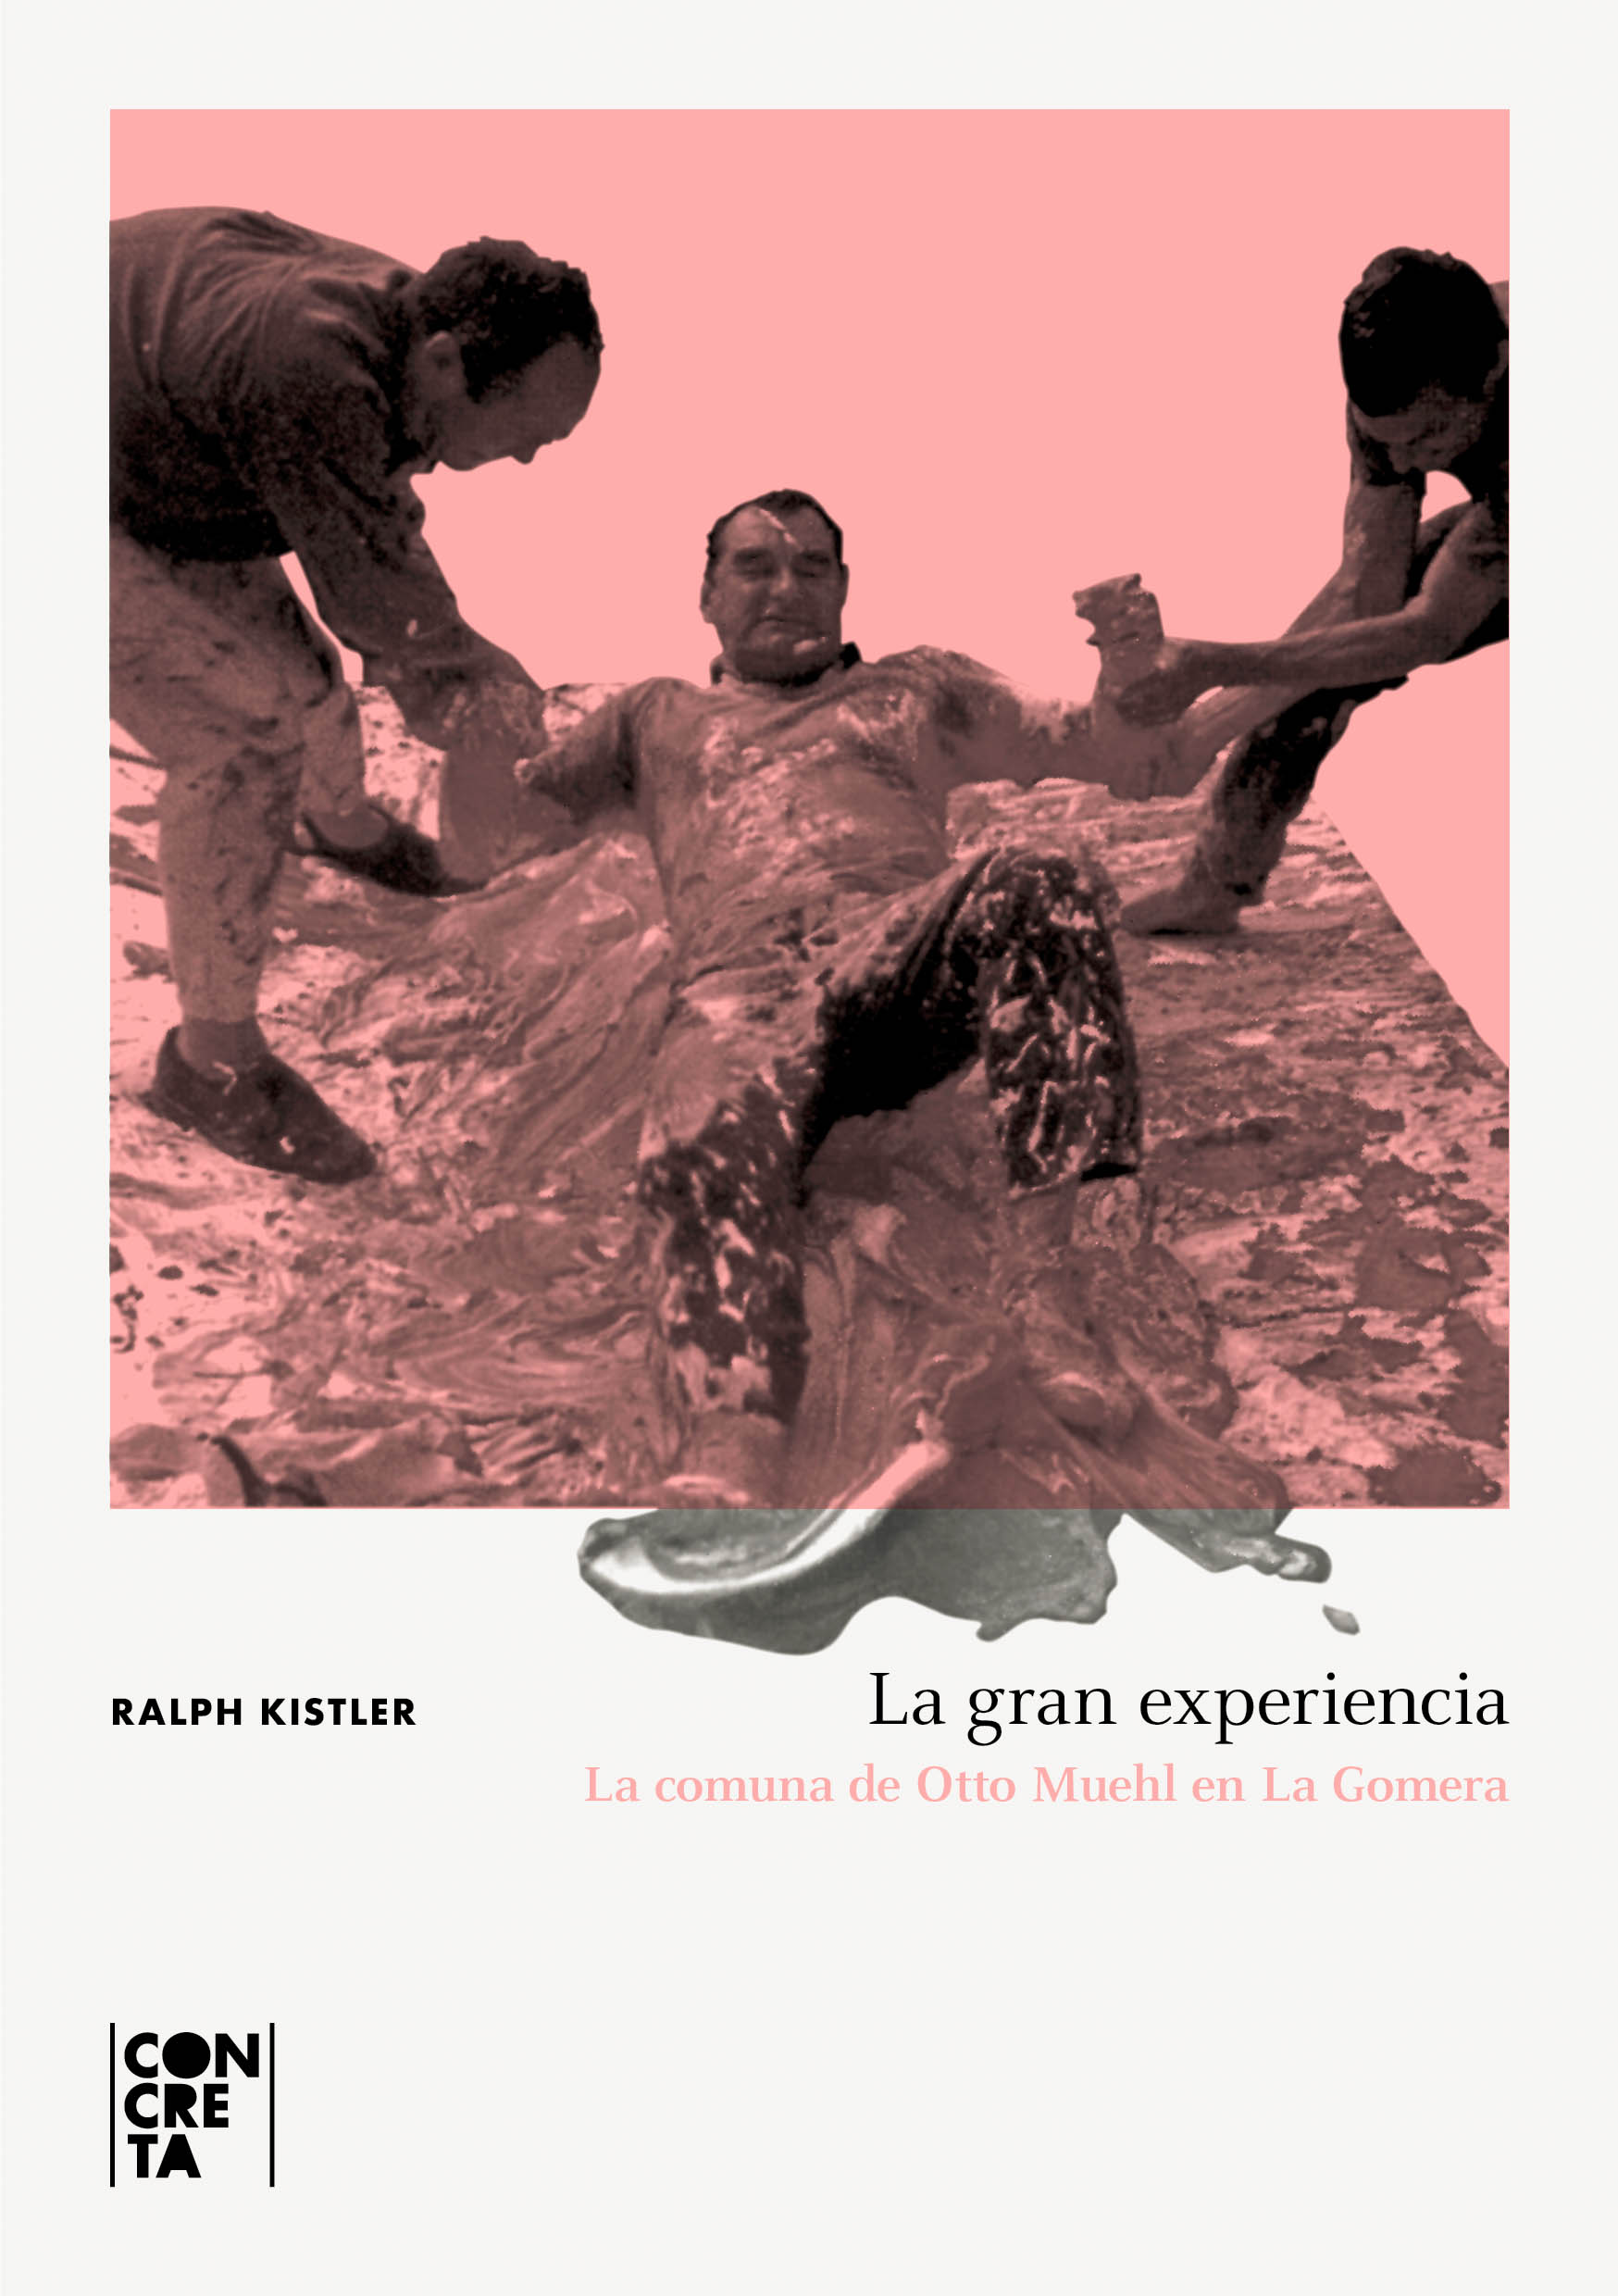
La Gran Experiencia
La comuna de Otto Muehl en La Gomera
Pages: 336
ISBN: 978-84-946891-1-6
Publisher Editorial Concreta (en)
Comprar en Editorial Concreta (es)
Buy on Amazon
Arte y turismo series
En colaboración con Turicom y El Cabildo de Lanzarote